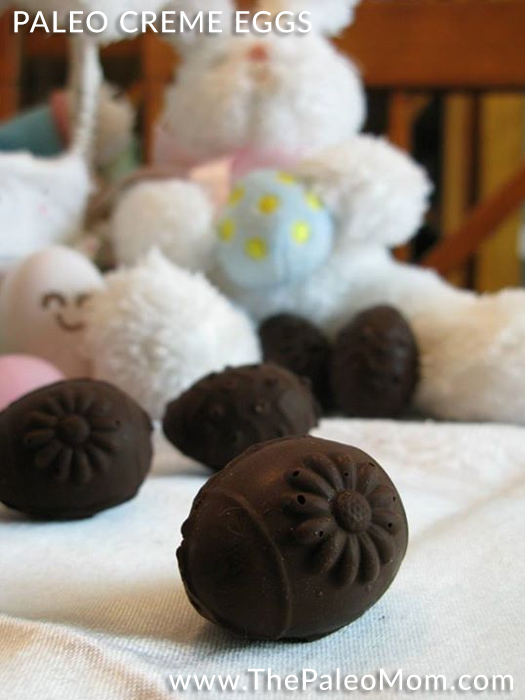
Cadbury Creme Eggs are my all-time favorite treat. In the past (like when I was 120 pounds heavier than I am now), I would start buying them as soon as they were available in the stores before Easter and stock-pile them for the months afterward (I would literally eat 2-3 every day for months). So to see them appear in the stores this year (full of crazy amounts of sugar and dozens of ingredients that my family and I just don’t eat anymore) filled me with a mixed sense of nostalgia, revulsion, and temptation. It quickly became my obsession to create a version of these with something like one third the sugar content and without any gut-irritating ingredients. Now, I feel like I can indulge that creme egg craving, without causing serious damage to my gut and without completely derailing my efforts to be healthy.
Yes, this recipe contains sugar. If you’re wondering about the use of sugar in a Paleo treat, you might want to check out Is Sugar Paleo? and maybe TPM Tidbit: How I Feel about Paleofied Baked Goods. Also, this recipe makes at least 4 dozen creme eggs, so it works out to just less than 2.5 tsp of sugar per egg (compared to about 6 tsp of sugar in the Cadbury version).
The first step for making creme eggs is to make a fondant. Two tools that you absolutely need for making fondant are a Oil & Candy Thermometer and a Standing Mixer
with a metal bowl (okay, you could actually mix the fondant by hand in a slow figure eight motion with a spatula in a glass or metal bowl for thirty minutes after removing from the heat, if you really wanted to). But other than having to watch the temperature as it simmers, it’s actually really easy to make. As the fondant cools, I mix in a little extra water to thin it out and some vanilla for flavor. At his point, this is the non-corn syrup version of what the creme egg center is made of (and if you really, really wanted to OD on sugar, you could use it straight). I then “dilute” the fondant with Palm Shortening
, resulting in a much lower sugar creme filling and adding some healthy fats too! Note: Extra Virgin Coconut Oil
does not work. It separates from the fondant and creates a disgusting mucus-like texture. I think that grass-fed butter may work, but I haven’t tried it. As an aside, if you were interested in making fondant for other purposes (decorating a cake, for example), don’t thin it out with water as it cools and then knead the dough by hand after it’s done mixing to room temperature.
This fondant recipe makes enough fondant for about 4 dozen creme eggs (depending on the size of your Candy Mold). It would keep a very long time in your fridge (at least a few months), so if you don’t want that many eggs, you could just save the remaining fondant for the future.
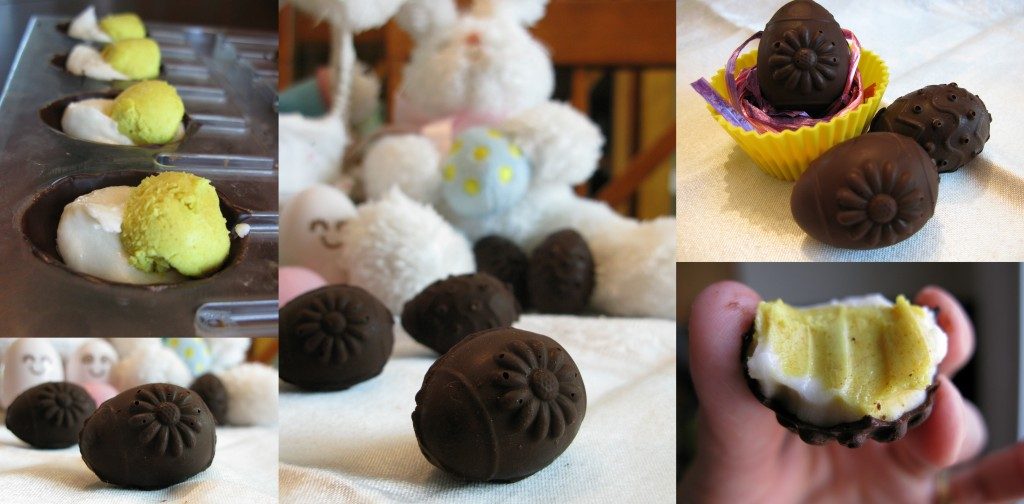
A note on assembly: the instructions are lengthy, but I assure you these are quite easy to make. This was my first time making fondant and my first time working with Candy Molds. You can see from my photos that my eggs aren’t perfect, but they still look pretty darned good if you ask me. So, don’t worry if your eggs aren’t quite perfect. By the time you are staring at a basket full of them, you really won’t care!
Ingredients (Honey Fondant):
- 2 cups organic granulated sugar (it would be healthier to use Sucanat
, but your “whites” won’t be as light)
- 1/3 cup Honey
- 1 cup + ¼ cup water
- 1 Tbsp Vanilla Extract
(you will get even whiter “whites” than I did if you use Clear Vanilla
)
1. Combine sugar, honey and 1 cup of water into a pot with a Oil & Candy Thermometer attached to the side.
2. Bring to a boil over low heat. You might want to stir a couple of times at the beginning but once it starts to simmer, don’t stir it.
3. The temperature will slowly increase. Bring it up to 238F-240F and then immediately remove it from the heat. It should take something like 15 minutes to get up to temperature.
4. Pour into the metal bowl of your standing mixer and mix at low speed with flat beater or paddle blade.
5. During the first five minutes of mixing, slowly add the extra ¼ cup water and then the vanilla (just a few drops at a time).
6. Let the fondant slowly mix while it cools down to room temperature. This will take roughly forever, depending on the temperature of your kitchen (well, maybe 30 minutes, but it will likely feel like forever). Pour into an airtight container and let it sit at room temperature for 12 hours, or overnight.
Ingredients (Creme Egg Center):
- 2/3 cup fondant (about half of the batch)
- 1 cup palm shortening (add more for a less sweet egg; I like Tropical Traditions or Spectrum Palm Shortening
)
- 1 tsp Turmeric
1. Mix room temperature fondant with palm shortening. Divide creme into two bowls, roughly 2/3 in one bowl (for the whites) and 1/3 in the second bowl (for the yolks).
2. Add turmeric to the 1/3 bowl. Mix well (makes a lovely yellow color but the dominant flavor is still the vanilla).
3. If you are going to use molds for assembly, chill the yellow creme in the fridge for at least 1 hour but leave the white creme at room temperature. If you are going to shape my hand, chill both in the fridge.
Ingredients (Creme Eggs):
- 6 oz 70-85% dark chocolate, (I used 4 squares of Unsweetened Chocolate
and 2 squares of Semi-Sweet Chocolate
to get about 85%).
- White and yellow creme
Candy Mold Method (assuming you have 2 identical “half-egg” molds):
1. Melt chocolate on low heat in a small saucepan, double boiler or in the microwave on medium power. Let it cool until quite thick (the warmer it is, the thinner your chocolate shell will be)
2. Using the back of a teaspoon, a small spatula, a pastry brush, or a clean paint brush, coat your mold.
3. Place in the freezer for 1-2 minutes for the chocolate to harden. Remove from the freezer.
4. Spoon enough white creme into the mold to fill about ¾ of the way to the top (a little more than 1 tsp in my molds).
5. Use a spoon or small scoop (a Melon Baller was perfect size for my eggs) to create a ball of yellow creme (this is much easier if the creme is cold). Place on top of the white creme near the base of the egg, so create the “yolk”. It’s okay with the yellow creme ball is above the top of the mold. Place these “yolk halves” in the freezer to harden (about 20 minutes).
6. Coast the second mold with chocolate. Place in the freezer for 1-2 minutes to harden.
7. Using a small paint brush or back of a spoon, add a little melted chocolate around the rim of each egg half (this is the glue that will hold the two halves together).
8. Spoon white creme into the molds, filling about 1/2-3/4 of the way. You might want to try one or two to get the amount right. Too much will spill out when you assemble the two halves, too little won’t be the end of the world but you’ll have a bit of a hollow egg.
9. Remove the yolk halves from the freezer. Gently pop out of the molds and ease it onto the new halves you just made.
10. If you have molds like mine with a stick hole for lollypops, use a little melted chocolate and a small brush to paint over the hole with chocolate. Also paint over any part of the seam where you can see the two halves didn’t join well.
11. Put the eggs back in the freezer and let harden 20 minutes before popping out of the molds.
12. Repeat until you have used up all your creme (or have as many creme eggs as you want). Store in the fridge or freezer until you are ready to eat them (they taste best at room temperature but don’t take very long to thaw).
Free Form Method (for if you don’t want to buy molds):
1. Make a small ball of yellow creme (a Melon Baller works well).
2. Use about twice as much white as you have yellow and use your hands to press all around the yolk and form into an egg shape (remind you of playing with play d’oh?).
3. Place on a baking sheet or plate gently insert a toothpick or kabab skewer into one end of your creme balls.
4. Put in the freezer for at least 20 minutes to harden.
5. Melt chocolate on low heat in a small saucepan, double boiler or in the microwave on medium power. Let it cool until quite thick (the warmer it is, the thinner your chocolate shell will be)
6. Remove creme balls from freezer and dip into melted chocolate. Roll back and forth while the chocolate hardens. Place back on the plate and put them back into the freezer for another 10-20 minutes.
7. Remove from the freezer. Remove the toothpick or skewer. Paint over the hole with a little extra chocolate.
8. Repeat until you have used up all your creme (or have as many creme eggs as you want). Store in the fridge or freezer until you are ready to eat them (they taste best at room temperature but don’t take very long to thaw).
